Building a Common Data Model is simple and can be stored in a Lake Store Gen2. This is how I built my own CDM in a Lake, and then connected Dynamics 365 Customer Insights to it.
A Common Data Model is a industry standard, semantically rich way of conforming data to a single standard so that many different types of applications can use it, including the ability to plug it into AI models without much configuration as the metadata and semantic labelling suit Machine Learning.
In this blog I will not go through all the detail of every step. You can view this YouTube video that I made to get a better idea.
Step 1 - Build your Pipeline and call the Mapping Data Flows
You can use Azure Synapse or you can use Azure Data Factory, both have the capability to create Mapping Data Flows.
Your dataflow will have 2 main elements, the ability to take the source CSV data and put it into a Delta Lake, and then moving data from the Delta Lake into the Common Data Model (CDM)
You have the creation and update of the Delta Lake and then you have the Upserts and the Deletes to the CDM
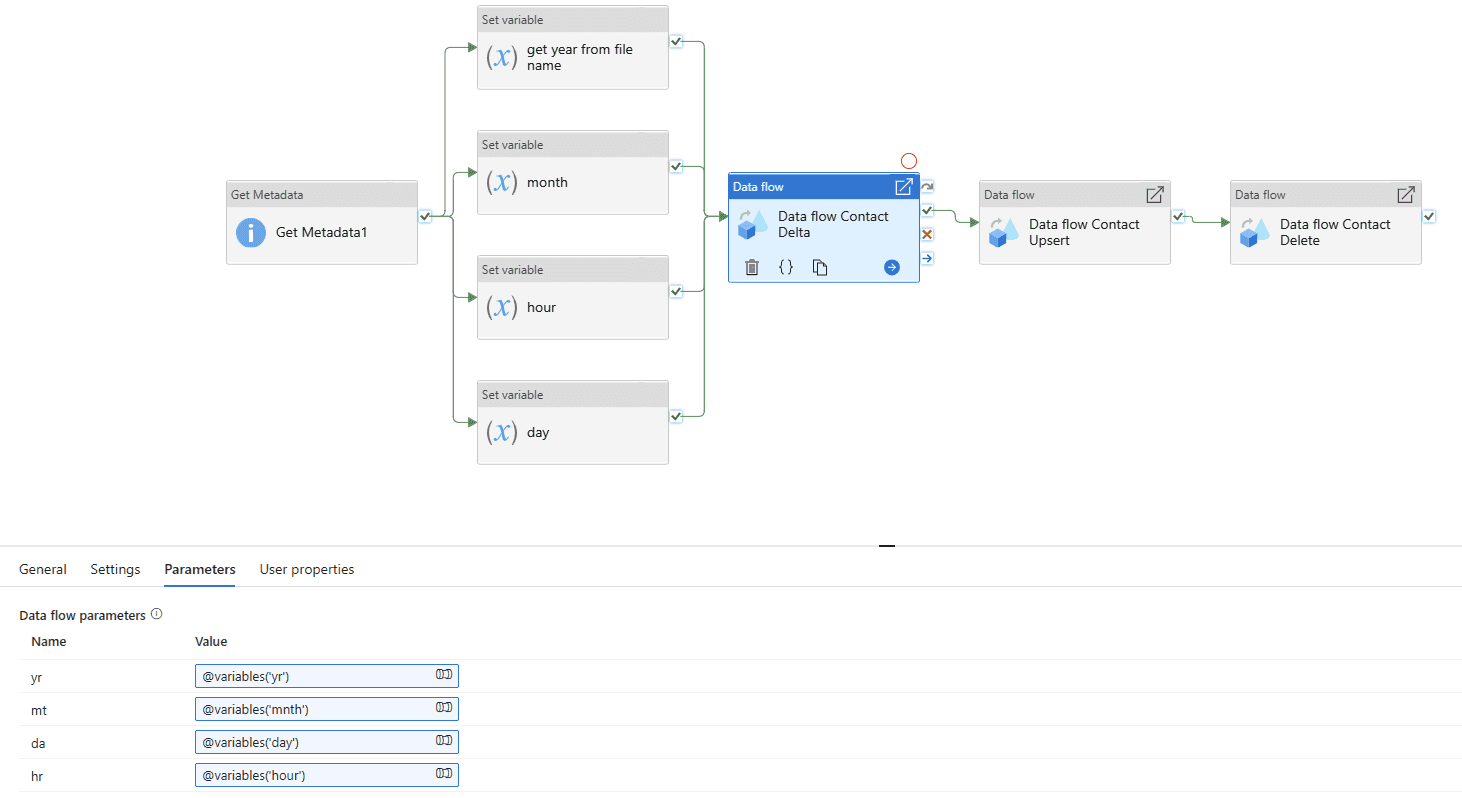
- I first get the file name and break apart the date that is included in the filename. Exmaple “contacts_20221020_0938.csv”. I take the year which is 2022, and the month which is 10, and the day which is 20.
- I then set them as variables as you can see in the screenshot where it has the “set variable” activities
- Then I call a data flow and send the variables with it
Step 2 - Inline sink type to build a Delta Lake
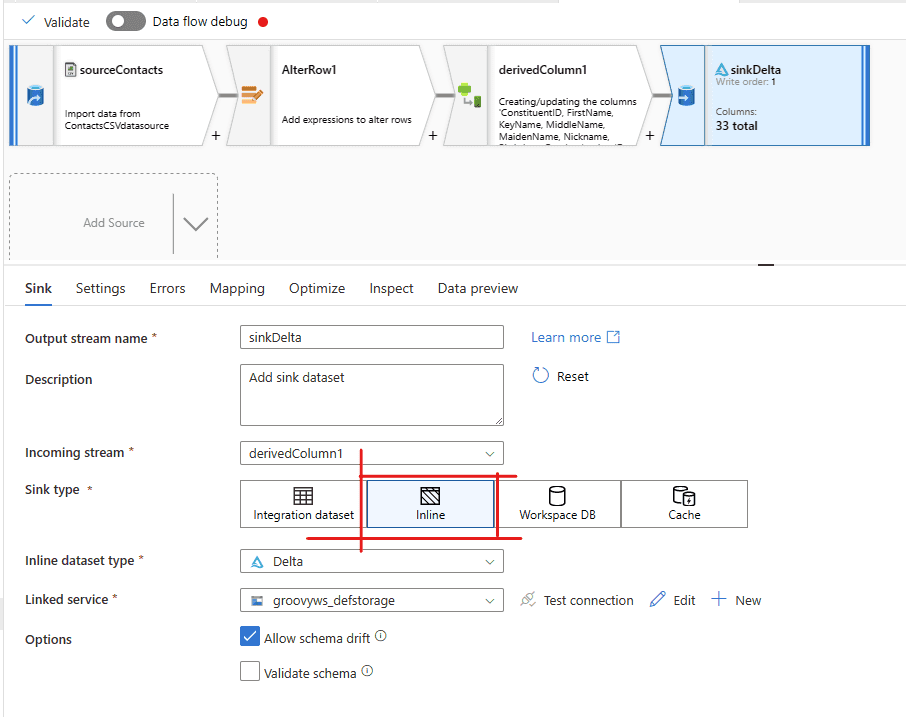
This is the first data flow that is called in the pipeline that you see above.
I have highlighted the “sink” here, you can see that it is an inline sink type. The “sourceContacts” is the dataset that is pointing to the blob storage with the raw CSV files.
The AlterRow1 is just doing a true() for upserts. I think this helps with only pushing new data and updating existing.
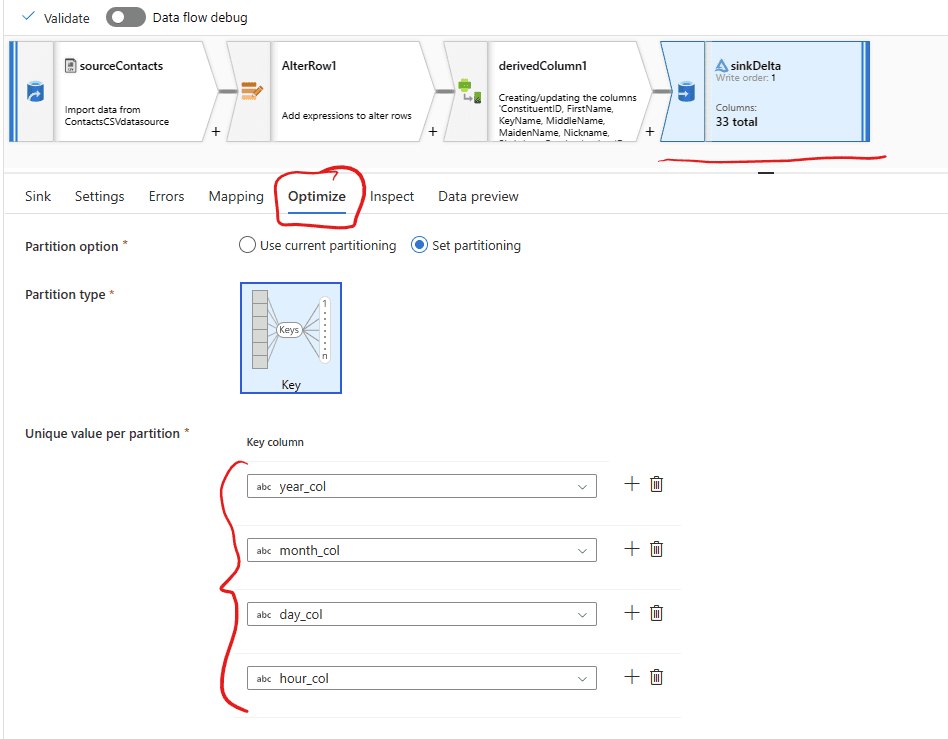
Partition it by year, month, day and hour.
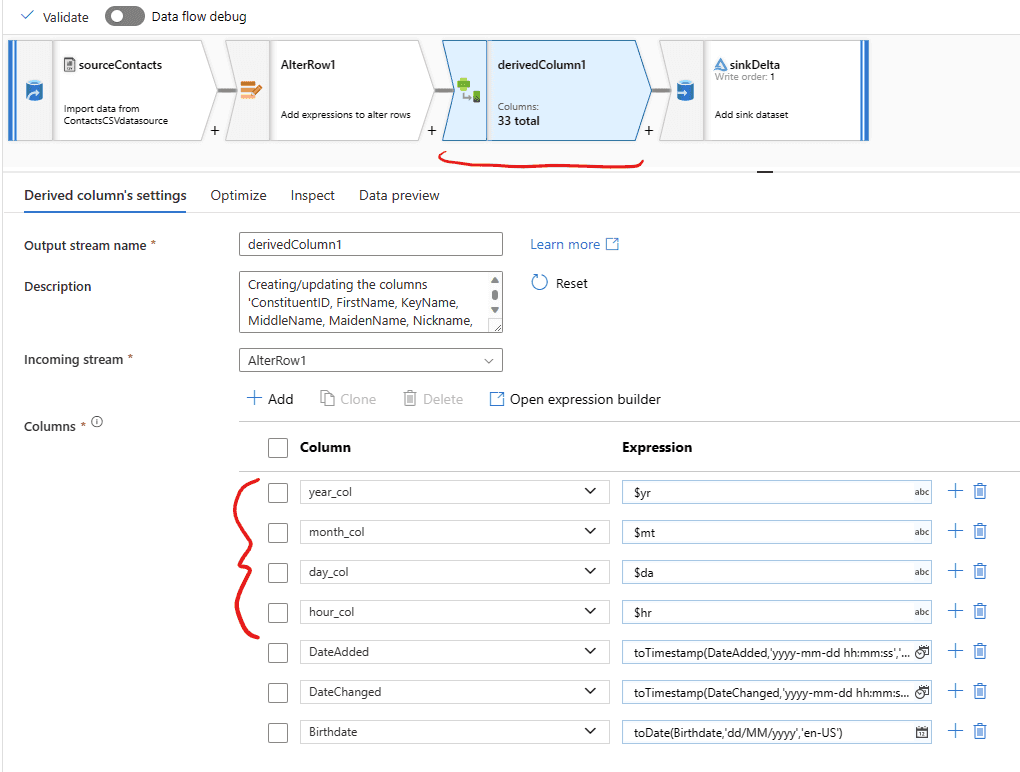
In order to do this you would have to create some “derived” columns. You create these columns based on the year, month, day and hour that was passed to this data flow from the pipeline (which was derived from the filename and stored in variables). See below for what that looks like
Onto the Sink activity now. Select the optimise blade. Then set the partition to year, month, day and hour (see the images below). This will make your delta lake look a bit like this
mydeltalake/year_col=2022/month_col=10/day_col-21,hour_col=09/somefileshere.parquetSee how I optimise here to partition it.
Step 3 - Inline sink type to build a Common Data Model (CDM)
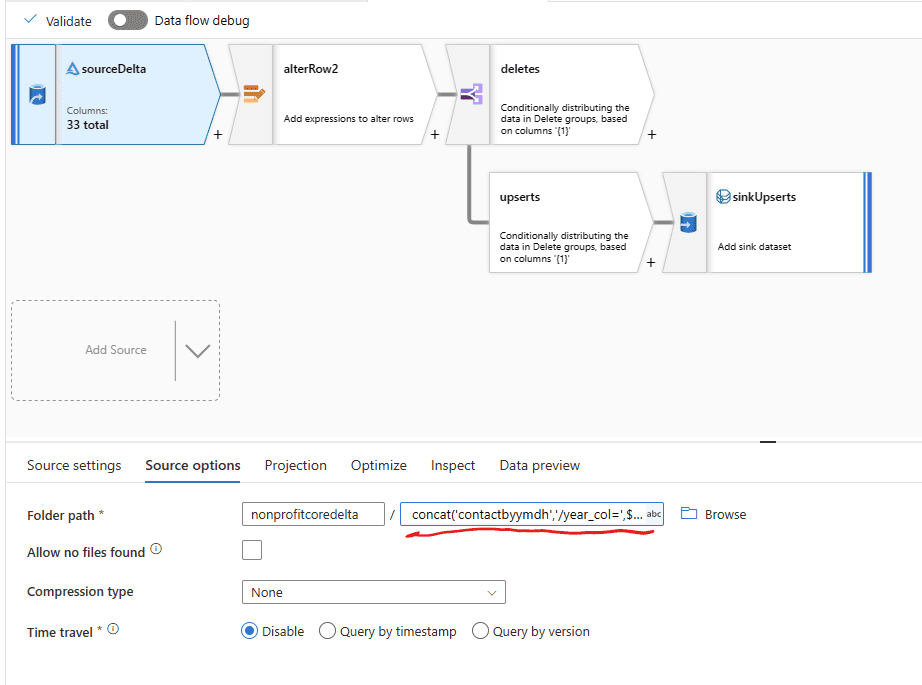
Now that you have your delta lake and its partitioned in yyyy mm dd and hh. You can ingest just the partitions that you want. In this screenshot you can see that the “source options” are set to only get the y m d h from the variables that are sent from the pipeline, so in this case it would be 2022 10 20 09. But obviously for everyday going forward that date would change.
The code to put in your folder path is
concat('contactbyymdh','/year_col=',$yearof,'/month_col=',$monthof,'/day_col=',$dayof,'/hour_col=',$hourof)
Settings and code you need for the CDM activity in the data flow

The “Corpus folder” is just where you have saved your custom cdm.json file (see more below on that topic)
The “Root location” is just where you want your CDM to be saved in your Lake store.
The “Manifest file” is optional to fill in, you can give is name like a I did, but its not necessary.
The json file that is used as your custom logical entitiy is below. Save it as a cdm.json file. You can see that my file was saved as ContactAdornLogical.cdm.json (see above)
You can also use Microsofts CDM github to point to. So instead of chosing the radio button that says custom you would chose “standard” and you would put in
/core/applicationCommon/Contact.cdm.json/ContactCustom
{
"jsonSchemaSemanticVersion" : "1.2.0",
"imports" : [
    {
    "corpusPath" : "cdm:/foundations.cdm.json"
    }
],
"definitions" : [
    {
    "entityName" : "Contact",
    "hasAttributes" : [
        {
        "name" : "firstName",
        "dataType" : "string"
        },
        {
        "name" : "lastName",
        "dataType" : "string"
        },
        {
        "name" : "contactId",
        "dataType" : "string"
        },
        {
        "name" : "emailAddress1",
        "dataType" : "string"
        },
        {
        "name" : "phone",
        "dataType" : "bigInteger"
        },
        {
        "name" : "dateofbirth",
        "dataType" : "date"
        },
        {
        "name" : "modifiedOn",
        "dataType" : "dateTime"
        }
        ,
        {
        "name" : "createdOn",
        "dataType" : "dateTime"
        },
        {
        "name":"Gender",
        "dataType": "string"
        }
    ]
    }
]
}
Step 4 - Connect to Dynamics 365 Customer Insights
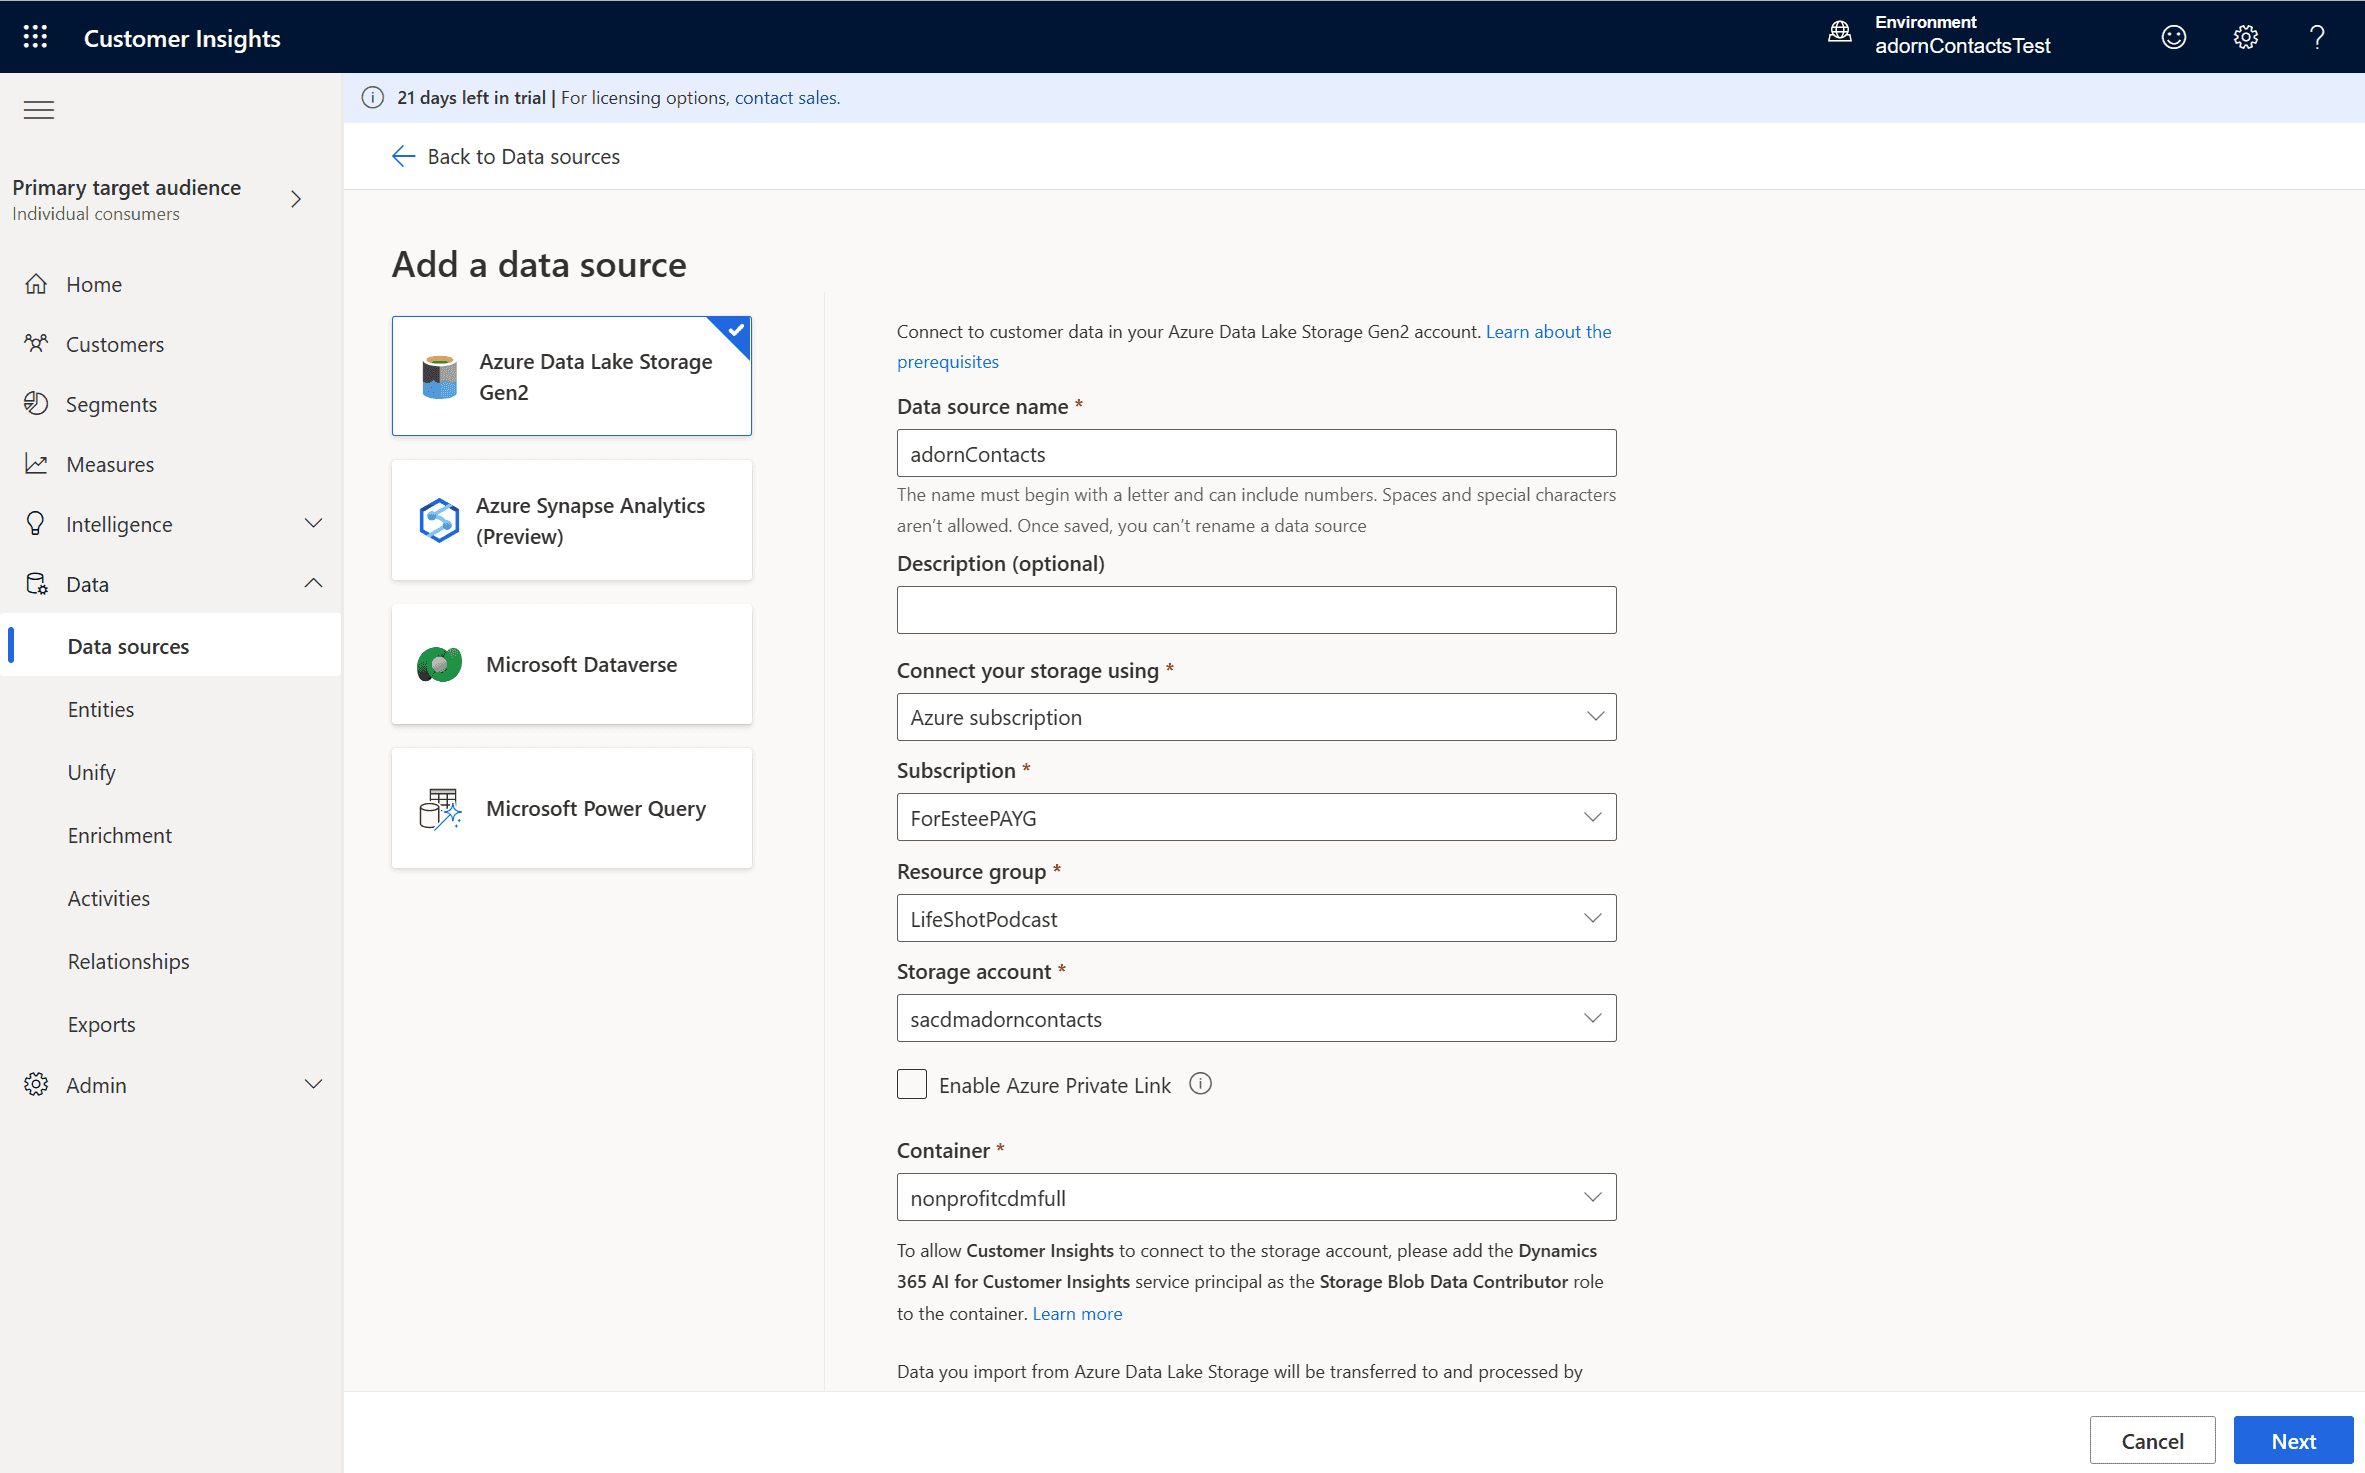
In Customer Insights you will add a Data Source and chose the Data Lake Gen2, this lake holds your Common Data Model which you created in the previous steps.
All the steps after that are explained in the pages. You have to add yourself and the Service Principal mentioned in this image below as Storage Blob Contributors.
You will chose the manifest file in the pages that follow and you will have to set a primary key, which is your “contactid”.
Once this is loaded then you will do a unify to get this data to show in your Customers area.
If you want to do Incremental loads into Customer Insights you must have the right folder structure. You will see that my dataflow has an upserts and a deletes flow. The code to construct the Upserts path is (you will put this in the data flow in Synapse or Data Factory in the Sink activity in the partition path under Root location, see above screenshots in steps 3)
concat('Contact/IncrementalData/',toString($yearof),'/',toString($monthof),'/',toString($dayof),'/',toString($hourof),'/Upserts')The Deletes path is the same, but ends with “Deletes”
Step 5 - Unify
In order for Customer Insights to know which data is used for its population of Customer records you have to do a “unify” action.
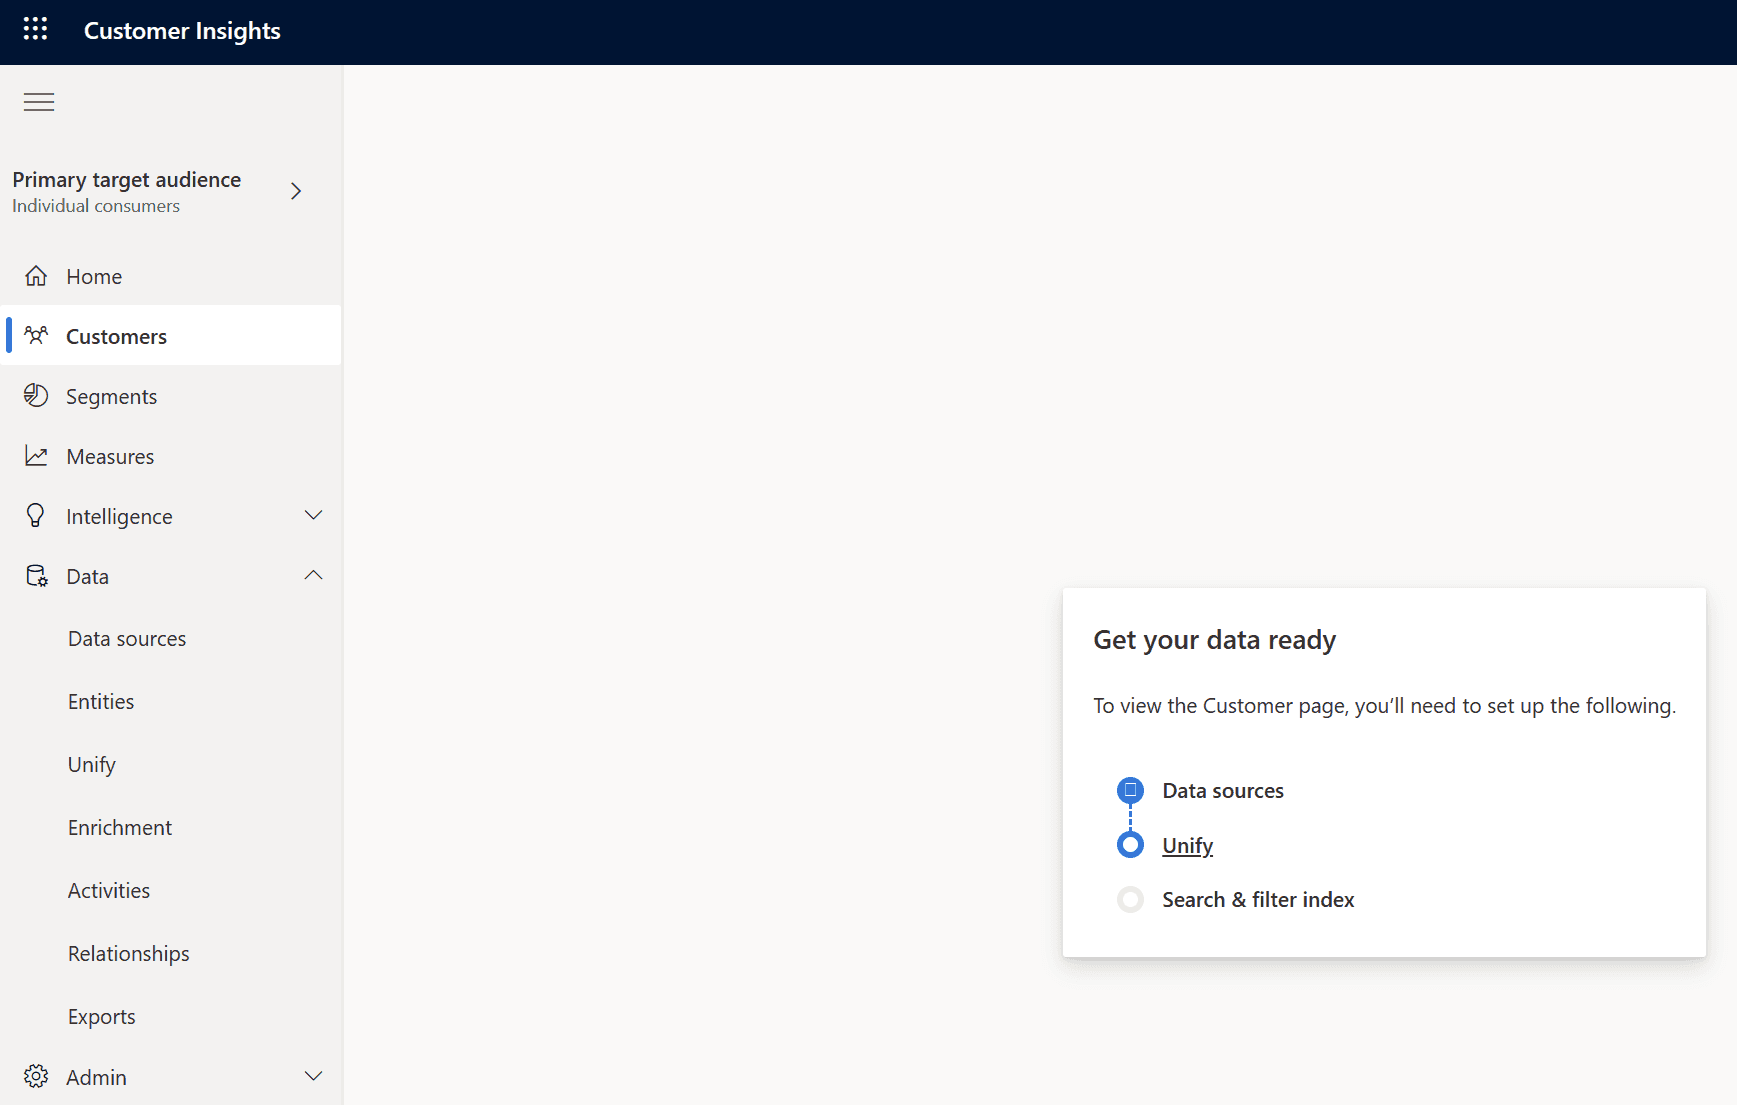
The steps are quite clear as you go through each page. Just click on next as you go, whilst following the instructions. You will get to the last page which says “create customer profiles”, hit that button and wait for a few minutes while it builds your customers!
When you see this then you have done it, but CI will still be refreshing your “Search and filter” so give it a few minutes.

And now, that is it, our customers are populated from our Common Data Model. You can run more days of data in.
Great success
